


I was thinking about the whole process of designing a set, and thought it might be interesting to write it all out. Putting everything down in writing validates the amount of work that I do!
So, here goes!
First, someone contacts me about designing a set. They usually find me on Etsy, and send out feeler messages to a bunch of the ladies on Etsy who make custom crib sets. I'm obsessive about checking my inbox about a million times a day, so as soon as I get a message, I reply right away with my price list, and inquire about whether they have specific colours or themes in mind. From there, we back and forth about possible fabric options. I send them a bunch of options, like this :


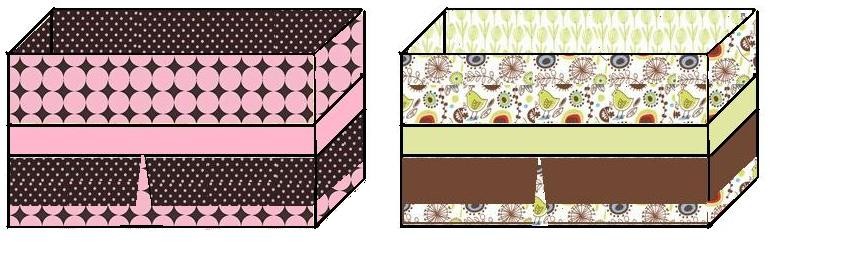
Then, I start drawing up a mock-up (or several) layout of how the various fabrics could go together. Sometimes it's easy, people know exactly what they want, and it only takes a try or two. Other times, well, it's not so easy, and it takes a hundred emails and dozens of layouts to get the perfect design. It's hard when people don't know what they're looking for! The design process is free...
Here are what some of my layouts look like!


Once we settle on a design, I post a custom listing for them to purchase

THEN, I calculate all the fabric I need, and shop around for the best deal. I get most of my fabrics online, although I have a really great shop that's not too far from us that has an excellent selection (and is where I buy all my notions). I buy all my fabrics at retail prices, with the exception of minky fabrics, which I get wholesale.
Most of the time, I have to go to Point Roberts (just south of the border) to the PO box I have there, to pick up my fabrics. In no way am I trying to evade paying duty on my purchases, I have everything sent there because shipping is cheaper, and WAY faster (read three days versus one month!)
When I get home, I open all the packages - I usually get about a dozen at a time - and sort my fabrics according to color. Everything gets washed in hot water, to ensure it doesn't shrink later on, then ironed (LOTS of ironing), then measured and cut to size.
Once all of that is done, I print out a project plan for each order, and get started sewing. I go in stages. For example, fitted sheets all get done at the same time, I cut all the corners out, sew them all, then serge them, then attach the elastic. If I'm doing bumpers, I cut all the pieces out, sew all the ties at once, then start assembling them. Once they're all sewn, they all get stuffed, and then I sew them closed by hand. When all my sewing is done for the day, or I can't see straight anymore, then I get on to finishing ends. With a serger, you have to finish the ends somehow, otherwise they can unravel, and no one wants that!! My method of choice, is to use a large embroidery needle, and feed the loose end back through the finished part of the seam.
Then, I iron everything again, clip all the loose threads, and fold it all as best I can to avoid too much wrinkling in transit. I package everything in plastic first, then, depending on size, wrap it in kraft paper, or heavy plastic wrap. I include a thank you note, and a business card. Once that's done, I label the packages, and head down to the post office. Everything gets shipped, and most of the time I have a tracking number, so I come home and add the shipping invoice to my massive binder, mark down that the item has been shipped, and try to remember to let my customer know it's on its way to them.
Ah, then I get to clean up my workspace, and get ready to make dinner, do laundry, wash the dishes, clean the house, snuggle my baby, love my husband, and get ready for the next day.
It sure is a lot!
Then end result is definitely worth it, though!


No comments:
Post a Comment